"And my people shall dwell in a peaceable habitation, and in sure dwellings, and in quiet resting places." Isaiah 32:18
Showing posts with label Hot New Creations. Show all posts

Wednesday, April 5, 2017

Barn Quilt

Don't you think barns deserve a quilt, too?   Huh???   I know, I know.   Some of you think I have finally gone around the bend one too many times.    For those of you who are the uninitiated I will offer up an explanation.   A barn quilt is a painting (on a square piece of exterior grade plywood) of a quilt block that would usually be done in fabric and made into a quilt.   Except it's a painting.   On wood.   To be hung outdoors.   Get it?

Barn quilts come in all different sizes and colors and vary greatly in the choices of designs.   Recently our quilt guild had a guest speaker, Suzy Parron, who has written two entire books about barn quilts, how they came to be, and where you can drive in your state to see them.   Here in Cumberland County we have a barn quilt trail.......you can drive thru certain rural areas and you'll spot a barn quilt on barns and outbuildings.   How cool is that?

After Suzy gave her lecture to our group she also taught a class on how to create your very own barn quilt.   I've been wanting to make a couple of barn quilts almost ever since we bought our farm, so, I was all in!!    Since taking the class I've been thinking about what barn quilts I would like to create for some of our buildings here at Whispering Oaks.   To that end, this is what I painted yesterday.
 And Joel loved it, too!    I painted it with him in mind and we decided to hang it on the end of his workshop.   It seemed to fit right in there.
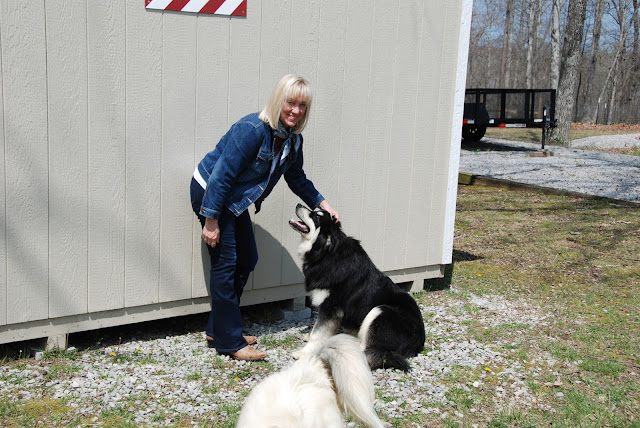
Of course, while we were there taking pictures the dogs had to come see what we were up to and get in on the action.   Shadow just loves a good scratch on the head.
When Jeremy and Hannah visited us a couple of weeks ago I asked Hannah if she would put her artistic talents to use for me and make a chalk board sign for Spring for our porch.    Didn't she do an awesome job?   I love it!
So this week I brought out my bunnies and sprinkled them around the house and screened porch.   This Peter rabbit fit right in with our Spring theme.    I'm so glad winter is behind us and I can "decorate" the outside of our house once again.  

Look for more barn quilts in our future,
Debbie

Monday, February 15, 2016

The Last (I hope) Slipcover

Yes, I hope this is the last slipcover I make for the foreseeable future.    A few days ago, I switched around a couple pieces of furniture in the farm house and put this green rocking chair out in the studio.   The white chair that had been in the studio is now in the living room where I sit to stitch at night while Joel and I watch tv together.    All in all, the switch of chairs was a win-win and they both "fit" better now.    This swivel rocker is very comfortable, but the dark green fabric hails back to our days at our much more formal Hunt Club house.   Ummmm,  not gonna work in my cheerful studio.   Yup, time for a change!
 Once again, I pulled fabrics from my stash and began tearing into yet another slipcover project.    Here you're looking at the right arm fitted and sewn.   Whew!    The pink fabric is oh-so-soft Minky and the front panel of the arm is left over fabric with, you guessed it......blue birds on it!
 Making progress.......the two seat cushions are done.   The lime green fabric was a throw that I had draped over a chair in its former life.   Now, the soft fabric is very cozy to sit on.
 Yup.    The second day of sewing yielded great progress.    The cream fabric is actually a vintage chenille bedspread I found at a thrift shop a couple of years ago.   I am always keeping my eye out for these babies because they make up great pillows and add a funky vibe to clothing as pockets and cuffs on jackets.  
 Just add the seat cushion......
 .....and the back cushion.......
 ......and my fun pillow that I made at my shop in Florida and it's done!
 I think this slipcover is now my favorite of the 4 that I stitched up this month!    And the easiest part of sewing this one was taking the original ruffled bedskirt already attached to the bedspread and repurposing it as the skirt of the slipcover.   Ta-da!  
That chenille bedspread yielded a whole lot of usable fabric.   What a find for $4.00.....wouldn't you say?
Here's a close up of the hot pink piping  and the bluebird fabric panels.    I love mixing all those fabrics and patterns together!  And this is the softest, snuggliest( I made that word up) chair in the house now.
Molly especially seems to enjoy the soft, cozy feel of the fabrics.   She hopped up here on the rocker when the job was complete and actually sighed as she settled in for a nap.    What a funny dog!  She knows her fabrics!
So just when I thought I was done adjusting the studio while Barb was here......I went ahead and added another tweak to the whole design.    Happy colors, happy fabrics, happy quilter.
Deb

Wednesday, February 10, 2016

From Hideous to Fabulous

This........

.......is Joel's hideous office chair.    The faux "leather" upholstery is actually a sad imitation of the real deal.    Yup, it's vinyl.   Ugh!    I don't especially like fabrics that try to replicate the real fabric because they seldom live up to my expectations.    And this chair covering is no exception.   The rest of the chair is exceptionally sturdy and Joel swears it's really comfortable....except for the cracked and peeling vinyl seat.   What's a girl to do?   Seamstress Debbie to the rescue!

I dug thru my stash of home dec fabrics and found enough pieces from previous projects to make a slip cover that would hold up to heavy use, look masculine and be comfortable.   Ta-da!  This is how it turned out.
 Not too bad, even if I do say so myself.   I deplore making slip covers.   Really.   Don't.   Like.   Sewing.   Them.    But they work so well.   And, in this case, it cost me nothing but my time to make this one.   Sure beats buying a new office chair for hundreds of dollars, right?

 The part of the slipcover I had the most fun making were these arm chair covers.   I decided to  put "patches" on the top.....reminiscent of elbow patches on an old favorite sweater.   The mattress ticking stripe fabric helped to keep the cover less formal.....more in keeping with the farm house.
 Figuring out how to make the fabric go over all the curves was the hardest part of the whole project.    But with a few pleats here and some creative adjusting there, I think it all worked out ok.  
And in order to be able to pull the whole thing over the chair, I had to allow some extra fabric in the form of a pleat in the back.    Yup, that worked just fine.   And it added a bit of dressmaker detailing that I love.    And the three antique buttons I found in my stash worked perfectly as closures for the pleat.
All in all, not a bad project.    Now that I'm on a roll with this whole slipcover thing......I am tackling another one that I'll show you in a few days.

Off to the sewing room,
Debbie

Friday, February 5, 2016

The Studio "Refined".....and Lots of Little Projects

Last post I told you that Barb came to visit us from Alabama.   When we all lived in Florida, she and I used to get together and help each other redecorate our homes by moving furniture around and making pretty little vignettes on tabletops with whatever items we found handy.    It was fun to "re-use and re-purpose" books and candles and pretty dishes from our cupboards.   While she was here, she and I had some fun in the farmhouse and studio once again moving furniture and hanging items on the walls which made the spaces feel cozier and more like "home".
One day she and I went to an antique store I like to check out every few months.   On this trip we found the baskets above.....perfect for hanging on the wall and organizing patterns, books and all my rotary cutting rulers.   How nice to free up some valuable counter space by removing the clutter and making use of the vertical space in the studio.   The sign on the wall was given to me by Julie and Jarrad over 25 years ago.  They bought it with their own money when they were teenagers and gave it to me for Christmas one year.   I've carried it around with me and used it in many different places over the years and now it has a home, once again, in my studio.    It makes me smile when I look at it and remember those two as teenagers.
Barb moved some furniture to create a cozy little sitting area just inside the studio door where I sit to do my hand sewing.   I found the little table at an antique shop on the day I took her back to Alabama.  And my footstool fits under it perfectly.   The teapot lamp is something I've had for years and I dug it out of the last box of items from our move here, cleaned it up and bought a new lampshade for it.
 This sweet little footstool has been recovered more times than I can count over the years.  It was fun to take a day and put together this little appliqué cover for the stool using Edyta Sitar's appliqué shapes from one of her books.  And the little bluebird reminds me of the bluebirds we have right outside the studio windows.
 After Barb left, I got busy with the next item on my list of "to-do's" for the studio.   The generic tan chairs at the sewing tables are super comfortable, but they're not especially jazzy to look at.   So, I pulled out all my Kaffe Fassett fabrics......a little bit of this and a yard or two of that.    I wanted to use the fabrics the way he does in his quilts........all mixed up with different colors and many different patterns.    I used everything from large florals to smalls prints, polka dots and batiks, too.  
 Kinda crazy, right?    But somehow all the mixed up fabrics seem to "work" together.   At least in my color craving mind they do.   And they're such happy colors, too.   The chairs got pretty ruffled skirts that hang half way to the floor, covering up the office look of the underside of the chairs.
 This looks like a dress to me, does it look that way to you, too?
 And here is the second chair with entirely different prints.   This chair has the same length skirt, piping around the seat and different fabrics for the side panels of the upper chair slipcover.
   
 The design on the back of both chairs is made using a template called an orange peel......because it looks like a section of an orange peel.   Ummmm, yea.   Anyway, I have been playing with that template this last few weeks and decided I liked it so much I wanted to use it as a decorative part of the upper back of the slipcover.   There is a pleat in the center back of the fabric and then to hold it closed I hand sewed  a hook and eye closure at the base of each orange peel.   All in all, I'm very happy with the way these slipcovers turned out.   And they bring my happy colors into the studio!
 Here is the quilt I am currently working on as it hangs on my design wall.   There is a lot more I'd like to do with this quilt and it will remain a work in progress for the next few weeks.    Each block is an orange peel appliqué.......some of the peels are from one whole piece of fabric, while the others are from 2 pieces of brightly colored fabrics I pieced first and then cut out the orange peel using the template.    All the peels are then placed on different colored background batik fabrics.
See what I mean about using different fabrics?   I just love the highly colorful nature of this quilt.   I'm working on stitching around each peel using lime green thread which is taking me a while to do all the blocks.   And I keep playing around with the direction of the peels.....some are laying on their sides while some are upright.    Pretty soon I hope to have the quilt laid out in a pleasing fashion and then I'll move on to the next step....some pretty awesome borders.
 This is the area by my ironing station.    Another of the baskets holds all my essential tools used while pressing garments and quilt blocks.    It sure is handy having everything out and conveniently located at the ready.
 Ok, so, now onto another project.    After I dropped Barb off at her house, I popped into her fabulous thrift store and within 5 minutes I was at the checkout with my "finds".   After spending only $7.95,  I jumped into my car with a grin......and three sweaters in a bag next to me on the car seat.  Now what in world am I going to do with three sweaters, you ask?    Make a wreath!  Yes!
I bought a straw wreath at Hobby Lobby and some "u" shaped pins in the floral department.    When I got back home, I used my rotary cutter and cut the sweaters into approximately 4" strips.....trying to keep the cable designs on the sweaters in the strips for some added texture.   Then, using the "u" pins I altered the colors of the three sweaters and worked my way around the wreath.....sticking the "u" pins into the straw wreath to secure the sides and ends of the sweater strips.   I found some tan and grey yarns in my knitting stash and randomly wrapped the yarn loosely around the wreath.    Three teal bells and a small pinecone were hung at the upper end of the wreath.   To hang it from a wreath hangar on the door, I slipped some satin ribbon around the wreath and tied a bow to secure it to the hangar.   Ta-da!    Now I have a winter wreath I can use year after year.
 When I discovered I had some bits and pieces of the teal sweater left over, my mind went spinning trying to think of different ways I could use it.   The end result is this mug rug.   Sorry for the dark picture.....darn.   Anyway, I used more Kaffe Fassett fabric pieces to sew around the sweater piece and now the mug rug sits on the little white table next to my hand sewing chair.  And no more cappuccino stains on my little white tablecloth.   Too.   Much.   Fun.  

Remember this from the last post?    Yes, it's the old album case.  Well, it's still a work in progress while I locate a larger piece of butcher block to overhang the entire top.  Then, the grain mill on the right, and the black walnut cracker on the left will get permanently mounted to the butcher block.   While it's winter, I have some plants inside like the small rosemary bush above.
It just wasn't very pretty sitting there in a plastic pot.   I pulled out some of my stash of burlap and put elastic thru some casing I sewed to the inside of the new bag.    Elastic at the bottom also helps when I take the plant to the sink for watering.   Now the bag doesn't get wet and I don't have to remove it every time I water the plant.   And it sure looks a whole lot better than the plastic pot with writing all over it.   A small bowl underneath the plant keeps the surface of the table top from getting wet and now it all looks much better to me.  

So now you know what I've been doing this winter......lots of little projects and a few bigger ones.  I love how some fabric mixed with a little bit of time and imagination can transform even the most mundane items in our life into something colorful and pretty.   And now I have access to the perfect studio where I can let my creative spirit fly.

Happy, happy farm chick,
Debbie


Saturday, April 11, 2015

Mud Room Reveal


 One of the blessings of having an enclosed 4 season porch is that it gives us a place to store things.....one of the problems of having an enclosed 4 season porch is that it becomes a dumping ground for anything that doesn't have a permanent home.   As my friends and family know, I like to keep things organized.....from my Tupperware filled pantry to the boot tray where we drop our muddy shoes and boots.    I despise piles!   I feel that any and all items in a home should have a place to store them.   You know, a place for everything and everything in it's place.

Well, for over a year now, we've been using our enclosed porch for everything from a sewing porch(until we finished off my new studio) to a holding area for coats, hats and mittens dumped on an overused clothes tree.   As we continue to find "homes" for all the loving items we brought up from our much larger home in Florida, I feel more and more satisfied that we are not living in total chaos.   Building a mud room cabinet wall was a natural in our progression toward that end.

So this is what we built this week:
Nothing fancy, this space just to the right of the kitchen entry door is all about function.   With a little country cute thrown in to make me smile.  We bought 2 pantry cabinets from Lowe's and installed them first with the amount of space we had available between the kitchen door and the 2 meat packed freezers.
My only request was that this fun vintage wire shelf fit in between the cabinets.   Now our coats have a designated place from which to hang, and there's plenty of space for hats, and whatever else we use on a daily basis, depending on the weather outside.   I love this shelf and have been waiting ever since we moved here to find a permanent home for it.   I think this space suits it just fine, don't you?
We took the extra shelves out of the bottom of both pantry cupboards and reused them in the upper section, which gave me a safe place to finally store my platters where they won't get banged around and chipped.   My electric griddle even fits up there.   Yippee!  Another big kitchen item finally has a home.
As these cabinets were meant to have shelves in them and not hanging coats, we had to come up with a solution to attach a bar for the coats that would be secure enough to hold a bit of weight.    Ta-da!   Joel came up with the idea to use 12" wide melamine shelving and it worked great!    And I'm so happy we can hang our winter coats out of sight until we need them again next year.   I also had extra door knobs from our kitchen project and we used them on this project so as to make it blend in with the new kitchen.
All winter long we three would drag our muddy boots into the kitchen so we could sit down on a chair to put them on before going outside.   You know what that meant.  Yup.   Caked on mud always ended up all over the floor as we walked around.   Joel put together this really sturdy bench seat in between the cabinets so now we have a place where we can pull out our boots from underneath the bench, sit down and put them on before going outside.   Problem solved.
Unfortunately, my flash washed out one of the details I just love about this project.....we put vertical slats of beaded boards on the wall behind the bench and wire basket.   I'm sorry it didn't show up in this shot, but trust me, it looks really farm house-y.   You know, my kind of decorating look for our house.   The basket on the right is from Joel's Aunt Ruth and I use it to bring in flowers and veggies from our gardens.   It's just so much more satisfying to me to use pieces with a history while going about my daily chores.

As for the bench, well, I used the stain from our step into the kitchen and then sanded it in between each of 3 coats of polyurethane to make sure it will stand up to years of use and abuse.  Joel made sure it is good and sturdy with 3 supports underneath the 2"x8" bench boards.    And now there is a load of space beneath the bench to store our boots and shoes.   One thing about living on the farm, we track a lot of mud, dirt and grass into the house.   A lot!   I'm hoping that by pulling our mucky shoes off and placing them under the bench we can eliminate tracking so much dirt into the rest of the house.
When we were at Lowe's yesterday, I purchased 2 of these solid boxes and organized our hats, gloves, mittens and scarves in them.  Now they won't be a jumbled up mess when we go to use them next winter.   I still have plenty of room to install another shelf above the mittens and I'm sure I'll fill that space later today as I unpack yet another of the few remaining boxes in storage on the other porch.

I know what you're thinking, who knew it would take me over a year to finally finish unpacking?  I've always been the woman who was unpacked within two weeks of a move....pictures on the walls and everything!   But in my defense, it's kinda hard to unpack when we have such small closets and no garage.   Now we're finding more and more ways to be creative in our storage solutions and this mud room fix is awesome.
While I had the stain and polyurethane out, I decided to finish up the butcher block we installed last Fall in the butler's pantry.   It sure looks a lot prettier stained dark and all smooth from multiple sandings in between coats of the poly.
  Oh, yeah, this is much better now.   And, it's also easier to wipe the counter clean since it's a smoother surface.   This little space packs a lot of function into one narrow room.   The washer and dryer are behind me in the photo and the repurposed old kitchen cabinets provide tons of storage for Ball jars and canning supplies, large kitchen electric appliances like blenders and extra staples such as flour and sugar sacks that are large and heavy.
While I was in the mood to clean up our messy enclosed porch, I asked my guys to bring the old wash stand down there.   We removed the shiny brass handles and replaced them with drawer pulls that match the kitchen.   Ahhhhh, I see a theme developing here.    Dark handles against creamy white painted cabinets.   Yes!   It's all coming together now.
And since Spring is officially here to stay it was time to bring out a sweet little nest with 3 little eggs inside it.   I love to stack plates inside the huge glass cloche and layer the whole thing on top of a cake stand.   That's how I decorate for Spring!

So, there you have it.    Our "little" project of the week.   Oh, yeah, in between all the construction, we spent 6 hours mowing for the first time this year.   It's been raining so much we had to take advantage of the one day when the sun was out and the grass was dried out enough to mow.   Soon it will be time to plant the gardens.   And our muddy boots now have a new home......

.....in the mud room,
Debbie

Tuesday, December 9, 2014

Studio Reveal.....Finally

Yes, we have hung the last shelf and I even managed to put up a few Christmas decorations in my new studio.   We still need to build the breezeway to connect the studio to the house, but that's a project for another day.  Or maybe I should say, a project for another month.   At this point I'm kinda tired of moving boxes and bins and unpacking them, so, I'm thrilled just to be in the studio.   And it's done!
 One of the truly exciting things about this studio is the walking space I have around the cutting table and the tables which hold the sewing machines.   I've been packed into some small spaces over the years in various houses and this feels like a real luxury having some breathing room.   I still need to finish working on a couple of quilts to hang from the wire shelving behind the cutting table to make it feel more homey.   Besides, a studio has to display some quilts, right?
This end of the studio houses all my scrapbook supplies.   I love having this giant old oak table to work on and the pressed back chairs make my heart sing.   The armoir used to be in our bedroom and since there is no room for it in this little farmhouse, it has been repurposed as a wonderful storage vehicle for all the paper, stamps, and albums I use when I scrapbook.  

We just finished installing the wall shelf that houses my paints and ribbons.   Below that is the teal cabinet that used to hold record albums back in the day when we all had stereos that played records.  Now it is a great place to store works in progress.   And I just love my feather Christmas tree from my old shop.   It seems to fit right in here in the new studio.
After a good scrubbing, my old white comfy chair is ready for me to sit in to do my handwork.   And it's positioned right across from the tv so I can watch football or chick flicks in here and not drive Joel and Jeremy crazy.  And we brought my sweet chocolate table over here from the house with my favorite seasonal candle house on top of it.   I just had to string lights around the 4 windows of this new space to bring in some cheer during the bleak winter months.   They make me happy just looking at them.
Oops, sorry about the tubes of caulk.   I'm still putting things back in the workshop and these are on their way out the door.   Doesn't Flora the Flamingo look right at home here in her new digs?   Remember her from the shop?  
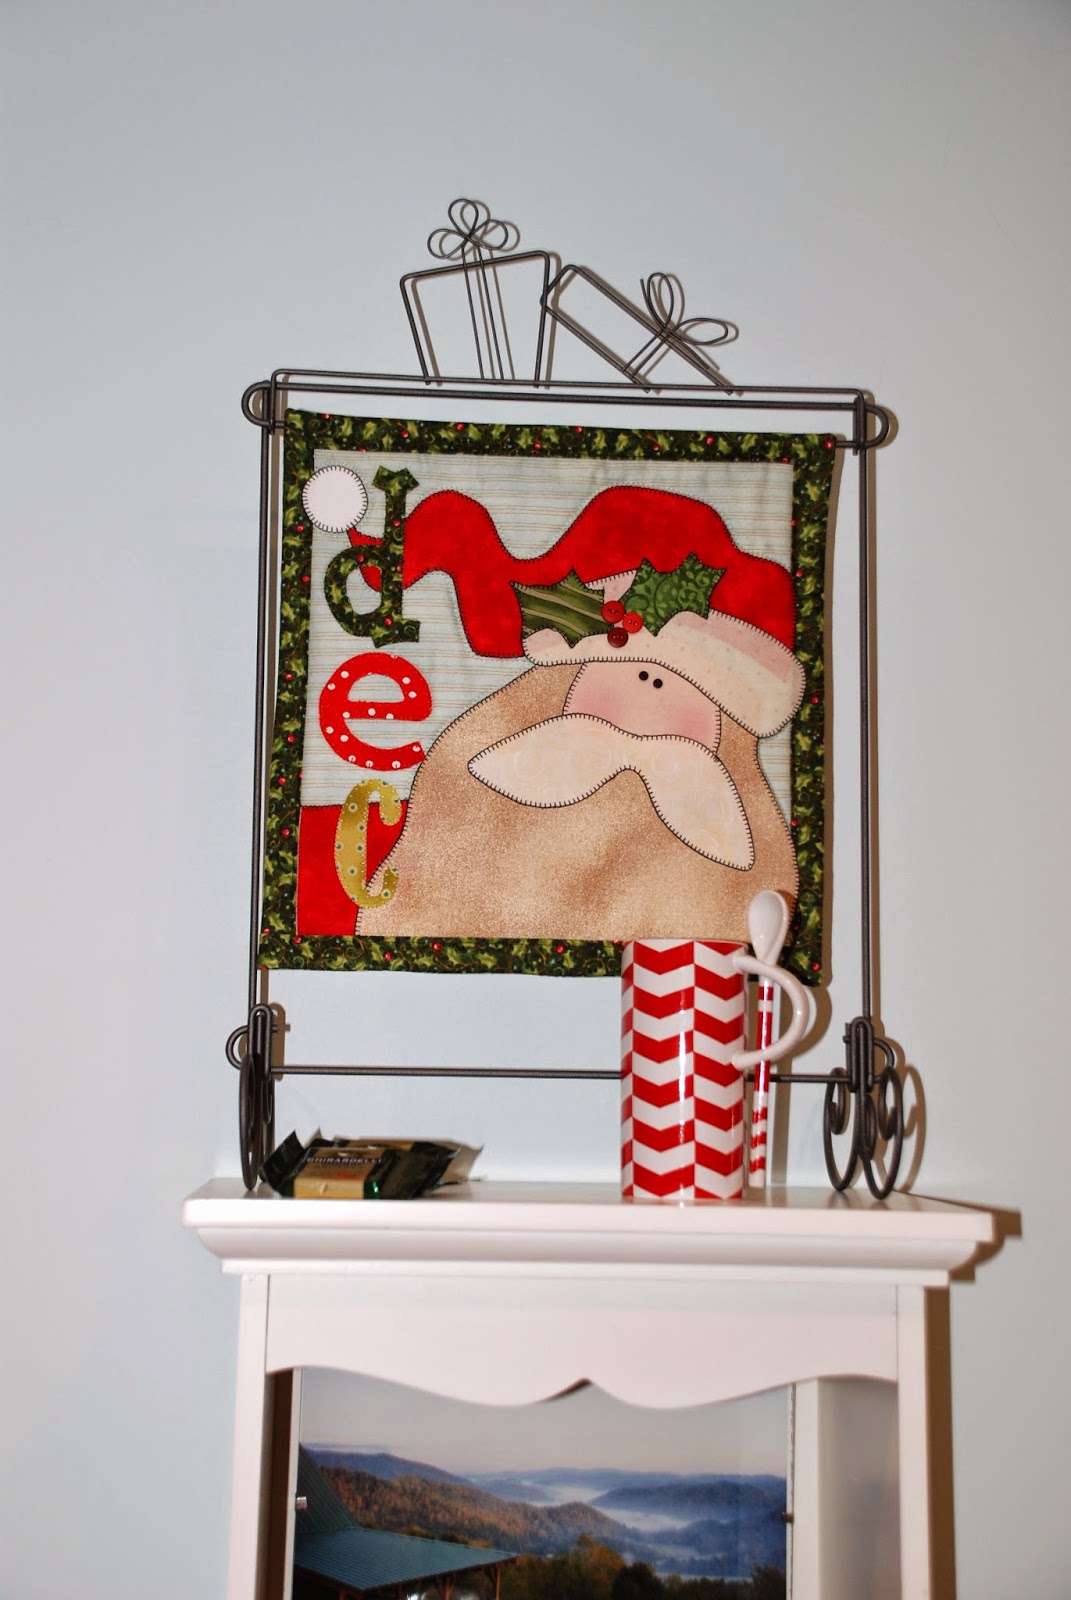
And now my monthly calendar holder has a permanent home on top of the narrow shelves.   Each month I can change out the mini-quilt.
Yes, the lights definitely "make it" for me.   It's hard to see, but I hung giant pine cones from lime green ribbon behind the lights.   The "private" side of the studio has 2 windows and I choose not to put blinds on these windows so my view of the farm isn't obstructed.   On the "public" side of the studio I did hang white blinds to match what we already have inside the house....and this gives me more privacy from the cars that pass on the road in front of the house.
It's so nice to have so many of my favorite items in one place where I can display them and enjoy them each time I enter the studio.  Joel gave me this huge piece more than 10 years ago for my birthday and I love turning it every three months to expose another season on each side of the house.  
This is the workhorse area of the space....2 wonderfully sized tables with my embroidery machine on the right and my everyday sewing machine on the left.   Now I have a large flat surface from which to work on my quilts.   Can't.  Hardly.  Wait.  
The cupboards on each side of the doorway going into the storage room are almost full.   I'm so glad to have the extra counter space, too.   This place is really a dream come true for me!  I love the soft blue walls contrasting with the light wood floor and the cotton striped area rugs bring a punch of color to the room.
I can wrap my presents on this counter and leave out the wrapping materials till I need them again.  Of course,  no sewing room would be complete without a proper ironing board and iron.  
As you can see, the storage room is full from top to bottom, but now everything is organized and I can find whatever I am looking for.  
Here's a peek at the left side and the metal shelving with bins on it.   All my seasonal decorating items for the house are in separate bins, so, when Easter rolls around, I just have to pull out my Easter bins and I can decorate the house without having to dig around in the attic to find what I need.   This makes it so easy and convenient for me.   Plus, I love being this organized.  

Well, that's the grand tour.   I'm sure I'll be tweaking the studio over the next year, but at least now I'm moved in there and can function once again.   I feel so blessed and realize what a luxury it is to have a dedicated space for me to "play" in once again.   Sewing and crafting bring me so much enjoyment and now I can hardly wait to hang out in my own special place.

Bring on the crafts,
Debbie